Basic Rigging Tutorial
I inserted a cylinder, used the 'scale tool' and dragged the cylinder so that it was longer. I then used the 'move tool' to move it into place. I then went from the 'channel box / layer editor' to the 'attribute editor' and then i changed the 'subdivision height to '50'.
I went into the 'front to view' by pressing space and scrolled my mouse to the box that said 'side view' and clicked space again. i then clicked onto 'create joints' and then the 'rigging' icon and then i inserted the rigging onto my cylinder. I then clicked onto the 'Xray joints' icon so that I could see the joints that I had added.
Next, I made sure that the rig was centered across all axis. I then selected the armature (the circle around the cylinder) and then I went onto the 'skin' tab and then the 'bind skin' tab, but I clicked onto the box attached and the 'bind skin options'. after that, I then used the 'move tool' to move the joints until the end of the cylinder was curved.


Rigging
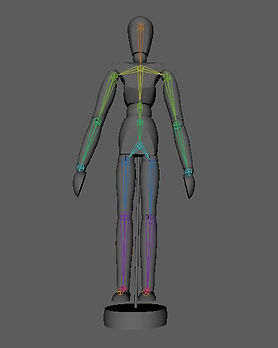
I went onto rigging and i repeated the same process as last week. I added the rigging to my mannequin so that I could make it move later on. I then used the shift button and clicked on all of the body parts individually and then i clicked onto the 'skin tab' and then I clicked the 'bind skin'